Can You Cut Sleepers With A Hand Saw?
Cutting sleepers can be a tricky proposition, especially for a DIY’er who doesn’t have massive powered saws. So can you use a humble hand saw? Will it go through a sleeper?
So Can You?
Yes, you can use a handsaw to cut a sleeper. Not only can you but it is often one of the best ways for cutting sleepers.
As I talk about in my how to cut sleepers article, there are a few easy ways to cut a sleeper, one being a hand saw and another common choice being a chainsaw.
A handsaw is a surprisingly good choice, with a few caveats. You need the right saw, and also need to be willing to put in a little elbow grease. But with a good sharp saw, you can fly through a straight cut. I timed myself cutting this sleeper at quite an easy pace and it came out at 1 minute and 10 seconds, not bad at all.
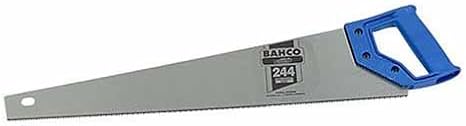
You probably want to get a new saw before attempting this, trust me, you will thank me later. Below is the saw I use myself and indeed the saw I used when cutting this sleeper.
Hand saws are an appealing option for a few reasons. One is obviously the price, you aren’t going to find a way to cut a sleeper at a lower price.
Another reason why you might want to choose a hand saw is safety. You are always going to be limited by how much damage you can cause with a handsaw. With a chainsaw not so much.
Step 1 – Mark Your Cut

Mark the sleeper with a pencil or marker pen. I like to mark down the side as well as this helps you ensure you remain straight when cutting through and that your saw is not wandering. A square will help you line up the mark down the side.
A handy little tip here is that hand saws commonly have a square built into the handle. Look for a 90° symbol on the plastic handle. This will show you where the square is.
Step 2 – Line Up The Saw Blade

I like to use my thumb here as a guide to stop the blade from moving when I make my first cuts. Pull back on the saw then lift and start again. This is to just get a small groove going for the saw to sit in, there is no need to go full hog yet.
Step 3- Start Sawing

Once you have your guideline sawn you can start making full strokes. Try and cut at an angle and always remember to use the full length of the saw blade. This will help speed up the cutting process no end.
Step 4 – Keep Going!

There’s not much else to say here apart from keep sawing! Also, try and keep your blade at an angle.
Done
So as I said earlier I timed my cut here and it only took 1 minute and 10 seconds. I wasn’t pushing overly hard here either so could definitely bring this time down. For a straight cut like this, I wouldn’t bother with anything else other than the hand saw. It’s cheap, the safest of all the options by a long way and also provides a really good clean cut, as you can see below.

For reference, I did the same cut with a chainsaw. The chainsaw took 30 seconds to make the same cut.
So while the hand saw is slower, and I don’t think anyone thought it would be any different, it isn’t that much slower.


