
How To Fix & Fix Into Plasterboard
If you have never worked with plasterboard before, you may be at a loose end when it comes to fixing plasterboard. How do you fix and fix into plasterboard? In this epic guide, I will address all of your plasterboard fixing questions, including fixing to studs, brick, ceilings and more!
How To Fix Plasterboard

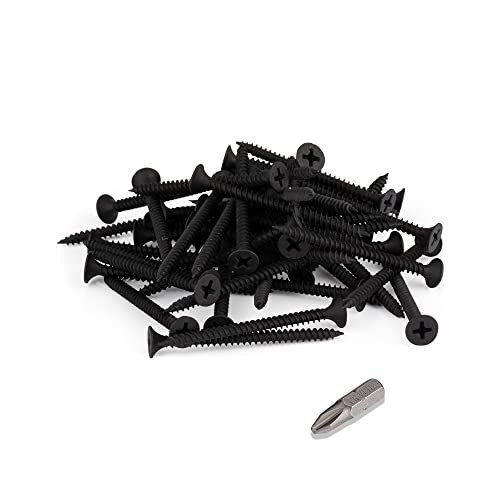
There are only two ways to fix the plasterboard. Plasterboard is either fixed mechanically with Black phosphate screws or fixed chemically using dots and dabs of drywall/plasterboard adhesive.
Plasterboard is fixed to timber stud work using Black-Phosphate Plasterboard Screws. These normally feature a crosshead requiring a Philips (PH2) bit. You can get caught out by this because modern wood screws feature a Pozi (PZ2) head which is slightly different. Hopefully, your box of plasterboard screws will come with a free Philips (PH2) bit, if not you might have to buy one separately.

Although you can fix Plasterboard using Pozzi (PZ2) bits, the best type of bit is a Philips (PH2)

Warning: Never Use Normal Wood Screws to Fix Plasterboard
Plasterboard Screws come in a range of sizes that differ from traditional wood screws, which generally increase in length in increments of 5mm.
The common sizes of Plasterboard screws are shown below. The most frequently used sizes, in new construction, are highlighted in bold.
| Diameter of Screw (Dia in mm) | Length of Plasterboard Screw (mm) |
| 3.5 | 25 |
| 3.5 | 32 |
| 3.9 | 32 |
| 3.5 | 35 |
| 3.9 | 35 |
| 3.5 | 38 |
| 3.5 | 42 |
| 3.5 | 45 |
| 3.5 | 50 |
| 3.5 | 55 |
| 3.5 | 60 |
| 4.2 | 65 |
| 4.2 | 75 |
| 4.8 | 100 |
The most common sizes of plasterboard screws for fixing plasterboards into timber stud work are between 35mm and 42mm. This is because plasterboards are normally 12mm thick, and Ideally, you want 1/3 of the screw going into the plasterboard, and 2/3 going into the timber stud wall behind. This will create a solid fixing of the plasterboard to the stud.
PH2 Philips Cross Head
You may want to choose a longer plasterboard screw if you are double boarding. This means placing one plasterboard over another. So you now have a 24mm thickness of plasterboard to screw through (12 + 12 = 24).
This is often done to increase the fire protection of the wall or to reduce sound transmission through the wall. A single skin of plasterboard offers 1/2 an hour of fire resistance, whereas a double-boarded wall or ceiling offers 1-hour of fire protection.
Fixing plasterboard into metal studs
Fixing plasterboard to metal studwork involves several steps:
- Prepare the metal studs: Clean the metal studs to remove any dust, dirt or oil. This will help the plasterboard adhere properly.
- Cut the plasterboard to size: Cut the plasterboard to size, making sure it fits between the metal studs. If necessary, you can also make cuts for electrical outlets or switch boxes.
- Apply adhesive: Apply a thin layer of adhesive to the metal studs using a trowel. Make sure the adhesive covers the entire surface of the metal stud.
- Attach the plasterboard: Place the plasterboard against the metal studs and press it firmly into the adhesive. Make sure the plasterboard is level and straight.
- Secure with self-tapping screws: Drive screws through the plasterboard and into the metal studs every 250mm to 300mm along the edges and every 600mm to 800mm in the field. Make sure the screws are driven into the metal flange of the stud and not the web.
- Cover the screw heads: Apply a thin layer of joint compound over the screw heads and smooth it out. Wait for the joint compound to dry, then sand it smooth. Or you could get the wall skimmed by a professional plaster.
- Repeat the process for the remaining pieces of plasterboard until the entire wall or ceiling is covered.
It is important to use the correct self-tapping screws and adhesive when fixing plasterboard to metal studwork. Make sure to follow the manufacturer’s instructions and consult with a professional if necessary. Properly fixing the plasterboard will ensure a smooth and stable surface for the final finish.

Fixing Plasterboard To Studs
One of the most common jobs when working with plasterboard is attaching it to a timber stud wall. In this blog post, we will show you how to properly fix plasterboard to studs for a secure and professional finish.
Step 1: Measure and Cut the Plasterboard
The first step in fixing plasterboard to studs is to measure and cut the plasterboard to the correct size. Measure the length and width of the area where you want to install the plasterboard. Use a straightedge or level to mark the plasterboard where you need to cut it. Use a Stanley knife or hand saw to cut the plasterboard to the correct size.
Step 2: Locate the Studs
The next step is to locate the studs, which are the wooden beams that run vertically behind the plasterboard. You can use a stud finder or knock on the wall to locate the studs. Once you’ve found the studs, mark their locations with a pencil.
Step 3: Attach the Plasterboard to the Studs
Hold the plasterboard in place against the studs and use a screw gun or cordless drill to attach the plasterboard to the studs using Black phosphate-coated plasterboard screws. It is important to place the screws every 6 inches around the edges or where two boards join, and every 12 inches in the middle of a sheet. The screws should be flush with the surface of the plasterboard.
Warning: Plasterboard Screws pulling through the paper
Step 4: Finish the Joints
Once the plasterboard is attached to the studs, you will need to plaster the wall or fill the joints. Use joint compound to fill any gaps or seams between the plasterboard sheets. Use a taping knife or putty knife to spread the joint compound evenly. Allow the joint compound to dry completely before sanding it smooth.
Step 5: Sand and Paint
Once the joint compound is dry, use sandpaper to smooth out any rough spots. Then the plasterboard is ready to be painted or wallpapered.
It’s important to note that if you’re attaching plasterboard to an unheated space like an attic, it is recommended to use a moisture-resistant plasterboard and also to install a vapour barrier before attaching the plasterboard.
In conclusion, fixing plasterboard to studs is an essential step in creating a smooth and professional finish. By following the steps outlined above, you can easily fix plasterboard to studs and ensure that your walls are secure and stable. Remember to always use the correct tools and materials, and take the necessary safety precautions when working with power tools and adhesives.
Fixing Plasterboard To Brick/Block
Dot and dab is a method of attaching plasterboard to walls, which is an alternative to screwing and nailing. This method is quick and easy to install, and it’s suitable for both new builds and renovations. Here’s a step-by-step guide on how to dot and dab plasterboards to walls:
Step 1: Prepare the Walls Make sure the walls are clean, dry, and free from any debris. Any cracks or holes should be filled with filler and left to dry.
Step 2: Measure and Cut the Plasterboard Measure the length and width of the wall where you want to install the plasterboard. Use a straightedge or level to mark the plasterboard where you need to cut it. Use a cutting knife or saw to cut the plasterboard to the correct size.
Step 3: Apply the Drywall/Plasterboard Adhesive to the wall in dabs. Try to space your dabs equally so that the plasterboard will be well supported. Imagine you are trying to create a 200mm grid.
Step 4: Install the Plasterboard Press the plasterboard firmly against the wall, making sure it’s level and flush. Hold the plasterboard in place for a few minutes to ensure it adheres properly.
Step 5: Finish the Joints Once the plasterboard is attached to the wall, you will need to finish the joints. Use joint compound to fill any gaps or seams between the plasterboard sheets. Use a taping knife or putty knife to spread the joint compound evenly. Allow the joint compound to dry completely before sanding it smooth.
Step 6: Sand and Paint Once the joint compound is dry, use sandpaper to smooth out any rough spots. Then the plasterboard is ready to be painted or wallpapered.
Also, use a moisture-resistant plasterboard if you are installing on an exterior wall.
In conclusion, dot and dab is a quick and easy method of attaching plasterboard to walls and ceilings. It’s suitable for both new builds and renovations, and it’s an alternative to screwing and nailing. Remember to always use the correct tools and materials, and take the necessary safety precautions when working with power tools and adhesives.
Fixing Plasterboard To A Ceiling
Fitting plasterboard to a ceiling is a common task in construction and renovation projects. It is a relatively straightforward process that can be completed by anyone with basic DIY skills. Plasterboard is a versatile material that can be used to create smooth, even surfaces on ceilings. Here’s a step-by-step guide on how to fit plasterboard to a ceiling:
Step 1: Prepare the Ceiling
Make sure the ceiling is clean, dry, and free from any debris. Any cracks or holes should be filled with filler and left to dry.
Step 2: Measure and Cut the Plasterboard
Measure the length and width of the ceiling where you want to install the plasterboard. Use a straightedge or level to mark the plasterboard where you need to cut it. Use a cutting knife or saw to cut the plasterboard to the correct size.
Step 3: Attach the Plasterboard to the Ceiling
Hold the plasterboard in place against the ceiling and use a screw gun or cordless drill to attach the plasterboard to the ceiling joists using plasterboard screws. It is important to place the screws every 6 inches along the edges and every 12 inches in the field. The screws should be flush with the surface of the plasterboard.
Step 4: Finish the Joints
Once the plasterboard is attached to the ceiling, you will need to skim it with plaster or finish the joints. Use joint compound to fill any gaps or seams between the plasterboard sheets. Use a taping knife or putty knife to spread the joint compound evenly. Allow the joint compound to dry completely before sanding it smooth.
Step 5: Sand and Paint
Once the joint compound is dry, use sandpaper to smooth out any rough spots. Then the plasterboard is ready to be painted or wallpapered.
It’s important to note that if you are attaching plasterboard to an unheated space like an attic, it is recommended to use a moisture-resistant plasterboard and also to install a vapour barrier before attaching the plasterboard.
In conclusion, fitting plasterboard to a ceiling is a simple process that can be completed by anyone with basic DIY skills. By following the steps outlined above, you can easily fit plasterboard to a ceiling and achieve a smooth, professional finish. Remember to always use the correct tools and materials, and take the necessary safety precautions when working with power tools and ladders.
How To Fix Into Plasterboard
There are many different ways to fix into plasterboard. Fixing into plasterboard alone with no timber or blockwork behind is always difficult.
After all, plasterboard only is made of densely compressed gypsum plaster sandwiched between two layers of paper.
But I believe I might have found the best way yet!

The best way I have found to fix it into the plasterboard is by using Dewalt Walldogs!
Warning!
I find these little beauties perfect for fixing into a plasterboard wall if you are struggling to locate the timber studs. All you need to do is drill a 5mm hole in your piece of wood, counter-sink it, then screw straight into the plasterboard with no need for wall plugs or toggle fixings.
If you are fixing a TV wall bracket to a plasterboard wall, then wall dogs are ideal. Wall brackets normally come with a series of 6mm holes in the backplate.
Simply fix your Wall Dogs straight through the back plate of the wall bracket, into the plasterboard behind. You can always add as many fixings as you need, or fill all the holes in the backplate to guarantee a secure fixing.
Here is a short video explaining how the DeWalt Wall Dogs can be used to fix a TV bracket to a plasterboard stud wall.
Types of plasterboard fixing
Plasterboard, also known as drywall, is a common material used in construction for walls and ceilings. When it comes to fixing objects into plasterboard, there are a few things to consider to ensure a secure and successful installation.
Different Types of Plasterboard Fixings:
Screws: Screws are the most common type of fixing used in plasterboard. They are easy to use and come in various sizes to accommodate different weight loads. For lighter objects, such as pictures, you can screw directly into plasterboard with a normal wood screw. For heavier objects, screws with Rawlplugs or toggle bolts are required.
Rawlplugs: Rawlplugs are small plastic or metal inserts that are used with screws to provide extra grip and stability. They are commonly used for fixing medium to heavy objects into plasterboard.
Toggle bolts: Toggle bolts are similar to Rawlplugs but are stronger and can support heavier objects. They have a toggle mechanism that expands inside the plasterboard to provide a secure hold.
These however are incredibly fiddly to fit and they require you to drill a large 8mm – 12mm hole. You need to have a decent-sized void behind the plasterboard in order to use them.
You can use Toggle bolts with a stud wall but you might struggle to use them on a dot and dab plasterboard wall. The void behind the plasterboard may not be large enough to fit the toggle behind.
Plasterboard is fixed to Brick/Block with a technique called Dot and Dab. This method involves applying drywall/plasterboard adhesive to the wall in patches called Dabs. The plasterboard is then pushed up against the wall and the Dabs hold the plasterboard in securely in place.


